Soldering on Brass Instruments
An email request from another young brass repairman prompted me to write down some tips on soldering on brass instruments, so it’s a good opportunity to expand this into a more comprehensive page. Brandon Chambers of Saied Music in Tulsa, OK asked for some tips for installing a silver plated mouthpipe on a newish silver trumpet with no traces that it had been done. First, I told him that for solder joints to be completely invisible, it would have to be plated over, but I believe that he meant that he wanted as little solder visible as possible and no silver loss.
Starting with basics, wipe or scrape off excess solder left on used parts. It is most efficient to wipe this off of all parts that are to be re-used as the instrument is being disassembled as well as removing burnt lacquer and areas that you expect to burn. The surfaces to be soldered must be clean of all but the thinnest of oxidation and must fit well. I most often clean the surface by buffing with tripoli. Even a clean looking surface can have a line of corrosion at the edge that was exposed in its previous mounting. This can sometimes prevent the solder from flowing into the joint as easily as it should. Scrape the rest until fresh metal (brass and clean solder) is exposed on the entire joint area. Inside of tubes and ferrules can often be cleaned with wire brushes but be sure to scrape out lumps of solder and oxidized crust.
The better the parts fit together, the easier it is to fill the joint completely and quickly. Where a tube fits into a ferrule, .001” is enough, although twice that is ideal. A force fit can’t be filled with solder beyond the edge and will fail eventually. When the tube fits with too much gap, the end of the tube can be stretched slightly with a dent ball or other tool. This both gives some friction for the joint to stay put while soldering and prevents excess solder running inside the instrument. In extreme cases, a brass sleeve can be machined or made from shim stock to take up a gap of more than about .007” (.014” diameter).
Brace flanges would also ideally fit with a uniform .002” gap for the solder, but this is never really achieved. Fit the braces as possible under the circumstances. Flanges silver soldered to sockets or rods can be manipulated by bending with fingers or pliers, hammered against rod, mandrels or balls and then scraped or filed to fit. Cast or forged braces, such as the diagonal braces from bell to mouthpipe on trumpets can be bent to fit as best possible with pliers, vise etc. and then filed, ground or scraped for a decent fit.
There are no reasons that standards should not be very high for putting instruments back together as the maker did originally. This almost always means with tubing parallel and perpendicular with the valve casings. Sometimes trumpet bells slope slightly upwards towards the flare, especially those by D. Calicchio, but never downwards.
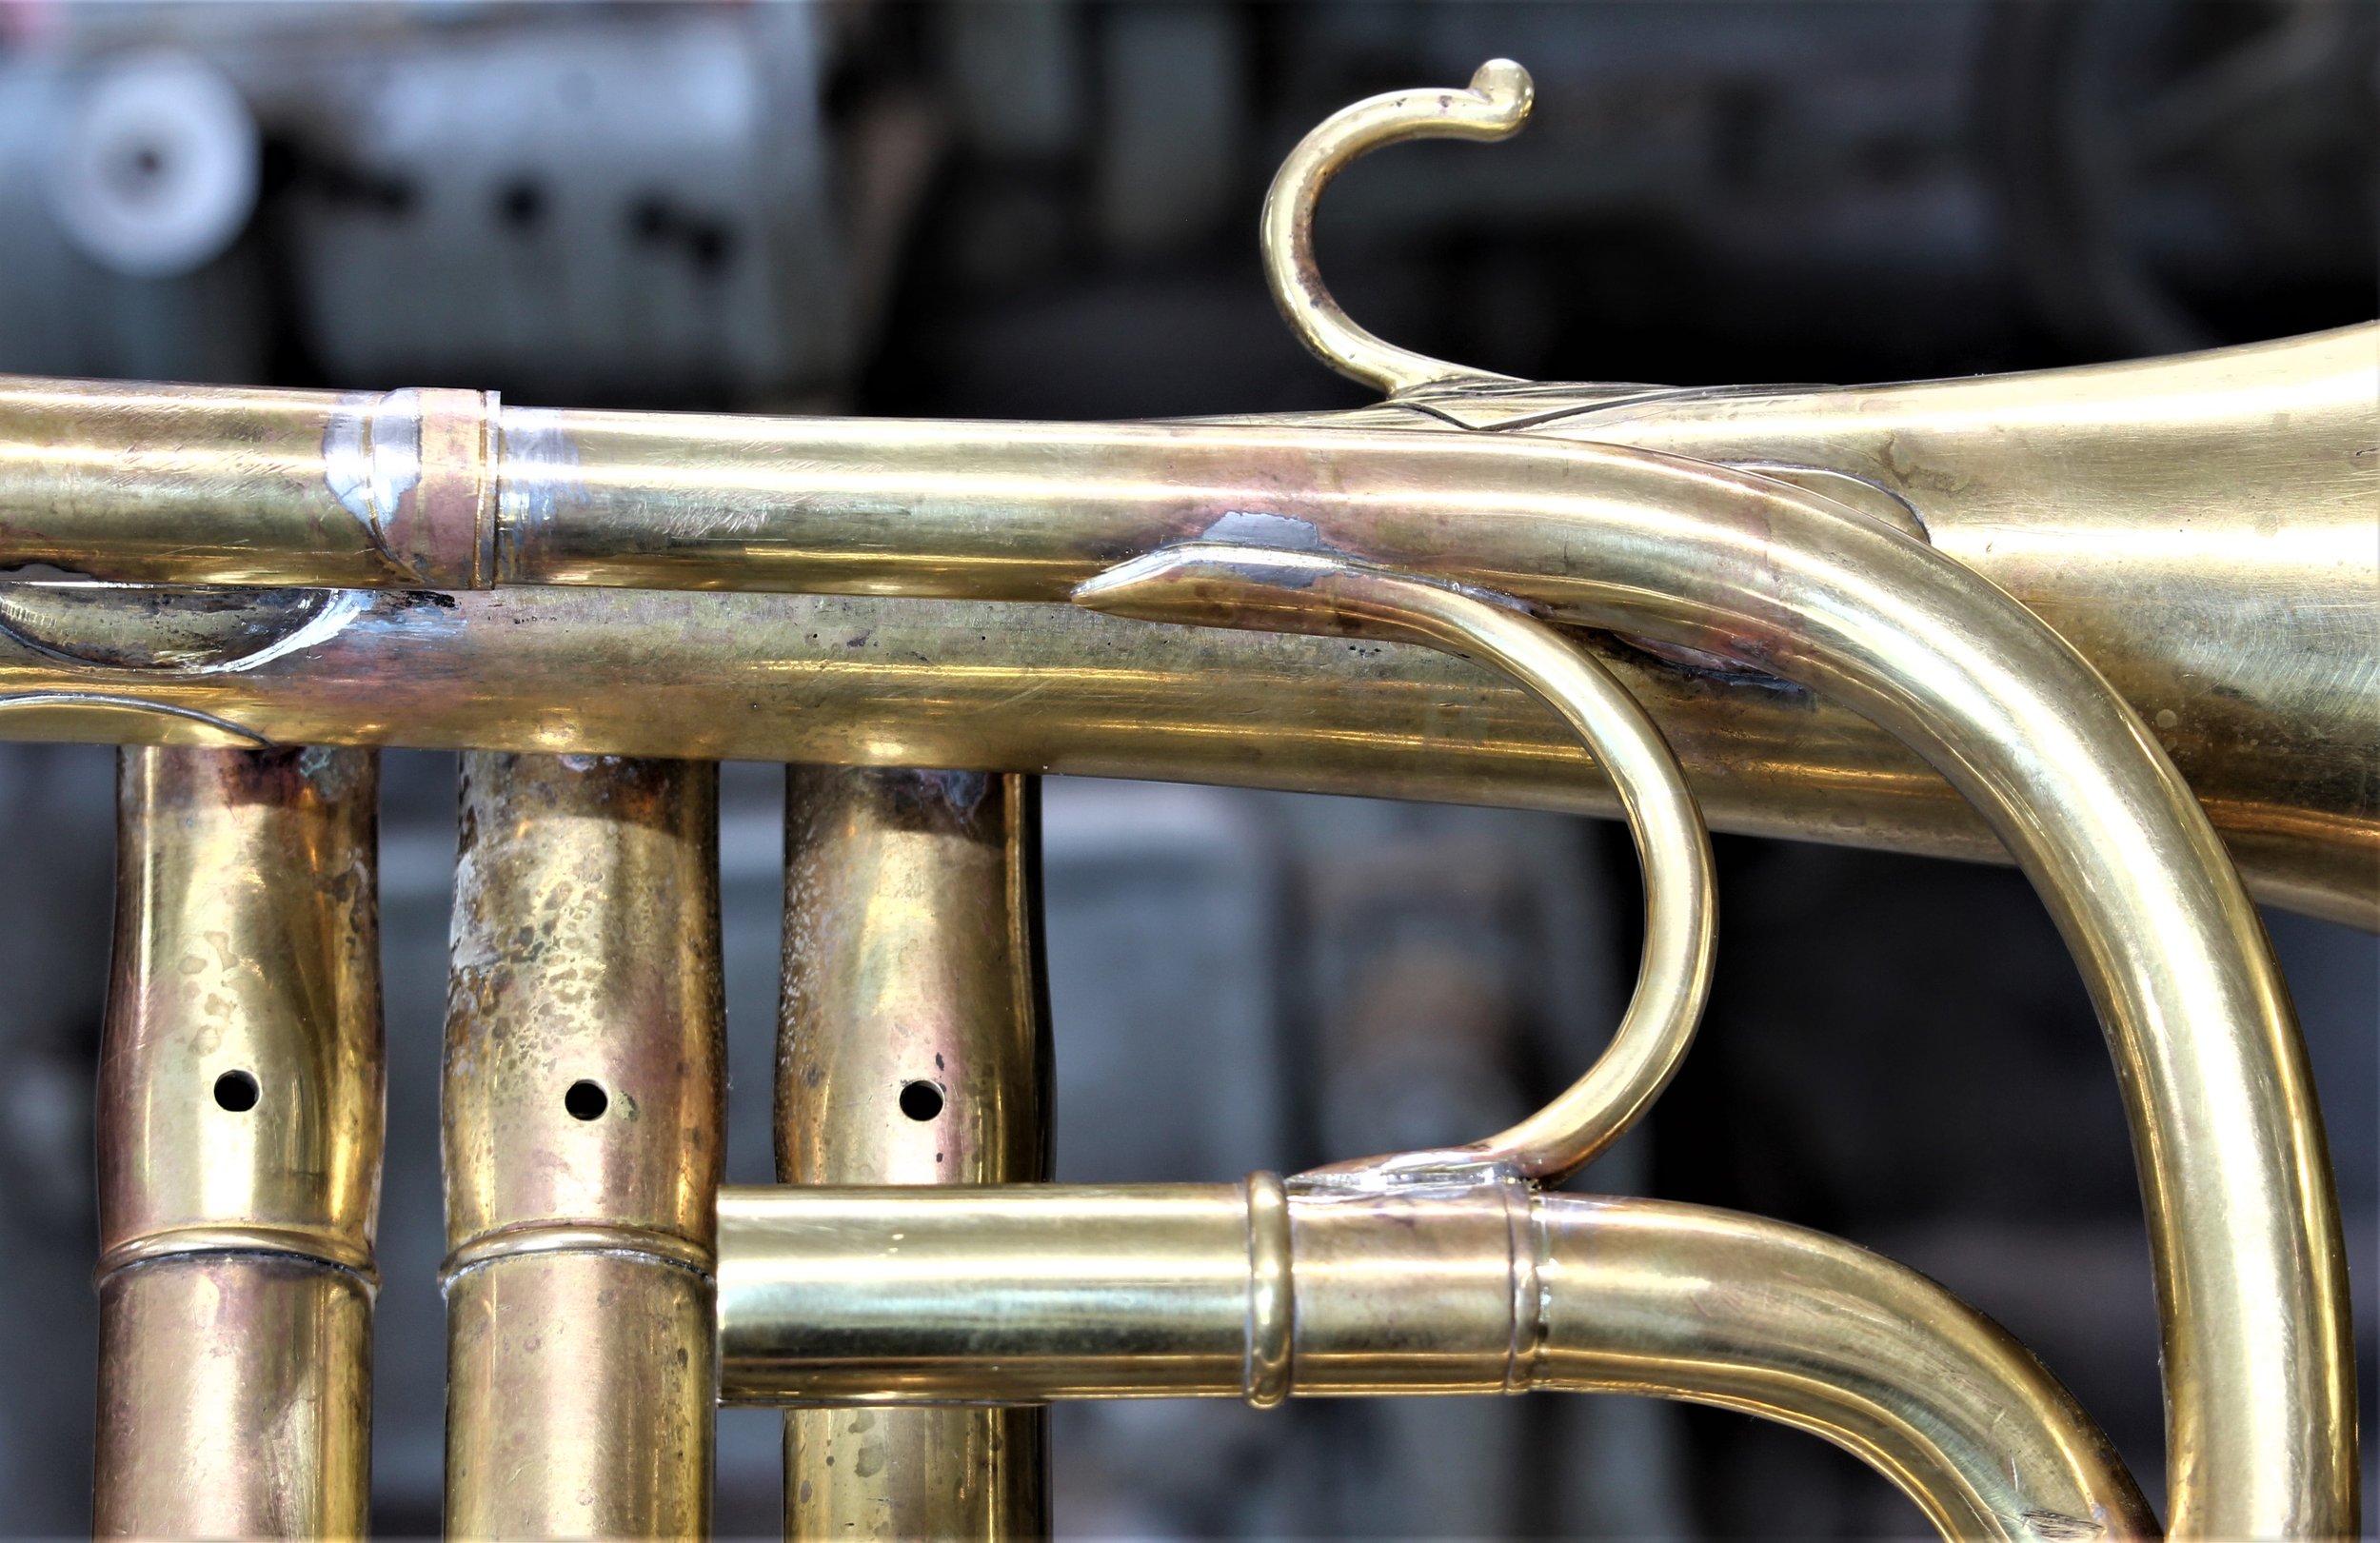
Before soldering, braces can be held to tubes with spring clamps, but I almost always used steel wire (annealed 20 gauge or 21 gauge for a lighter touch) to hold more securely. This can be seen in the second photo below.
Use high quality liquid acid flux and appropriate solder. The flux can be applied with a plastic bottle or dropper and will flow into the joint more quickly if the metal is heated first. Wear safety glasses, have good ventilation and avoid inhaling the toxic mist generated by the flux. Rinse any spatter off your skin immediately and be sure to wash your hands and any other skin that might have gotten spatter or mist. Solder alloys of tin and silver are becoming more common to reduce lead in our environment, but lead and tin solders (most often 50-50 alloy) are still favored by most. It can be useful to keep a lower temperature alloy around, such as 63/37 lead and tin. This may avoid burning lacquer.
The best quality work is most easily done with a high quality torch. Brass instrument manufacturers almost always used torches that mix compressed air with natural gas for both convenience and economy. Repair shops more often have used acetylene torches, such as Prestolite and Smith’s, that automatically mix atmospheric air in the torch. Similar torches using propane, butane etc. can be used, but are typically not as well designed for the purpose. In my teens, I started out using a hardware store propane torch, but was always frustrated at the lack of control of the flame. I now see in videos on the internet, the use of small torches that seem to work quite good, but I don’t know what sort of gas they burn. I believe that these are inexpensive and probably worth trying. Hydrogen generators that mix a tiny amount of methane eliminate the need to mix air inside the torch and are becoming more popular in small shops. You will probably find that you still need to have an acetylene torch on hand for most high temperature silver soldering.

Heat the parts evenly, adding flux as needed. Larger, heavier parts such as valve casings, thick braces etc. with take on the heat more slowly of course, so be careful not to overheat the thinner parts. Allow the flame of the torch to start heating the solder wire, but try not to melt it before it touches the edge of the joint.

As with anything being learned, it will take time and practice to judge when the parts are hot enough, but can be tested by touching the solder to the part with more mass. When heated sufficiently, the solder will run into the joint quickly and when filled, immediately remove the heat. As soon as the solder solidifies, it can be quenched with water, which will also start to rinse away excess flux. Check the perimeter of the joint to confirm that it is filled completely. If not, reheat, apply more flux and fill the gap. If there is a large volume of solder in the joint, it will contract as it cools and create a gap at an edge. If you carefully heat only the area of the gap, it can be filled without causing the bulk of the material to expand again.
It is of utmost importance not to overheat brass and nickel silver when soft soldering. Too much heat will anneal the metal, making it softer and much more easily deformed. On top of that, the solder will “crystallize”, mixing with the surface metal and becoming much harder. This will not clean off with normal practices, harder than tool steel, sanding grit and polishing compounds. The only way to remove it is to very carefully scrape it off with a carbide tool and significant brass will be lost. A diamond stone will also abrade the mess, but is harder to get to most areas This is bound to happen to you at least once, but the results will help you remember not to let it happen again.
Always keep in mind that the most exposed edges of the joint will be easiest to clean up afterwards and keep the excess there. This is somewhat controlled by tilting the instrument and filling the joint from a low point. Capillary action will allow the solder to flow upwards surprisingly quickly in an appropriate gap. Even after 40 years of experience, it is not possible to avoid having solder run out the back side on occasion, but it is a great time saver if kept to a minimum.
Hot flux will damage lacquered surfaces, so use a paper towel or rag to absorb the liquid as it spatters out if the lacquer is to be preserved. Both the flux and heat from the torch will cause oxidation of brass and silver plated surfaces, but is easily cleaned off afterwards. The heat of the torch will burn lacquer, which will also need to be cleaned off afterwards. Strategic removal of lacquer ahead of time is sometimes easier, depending on the type of lacquer. The old King lacquer, still used at the Eastlake factory, is especially problematic when burnt as is most epoxies. Use scrapers, sand paper and the like as needed before polishing. It is possible to heat epoxy lacquer to soldering temperature without burning, but a very difficult trick and the hot flux will tend to lift the lacquer. This is when to try the lower temperature solder.
Soldering silver plated surfaces without loosing much silver is quite possible, but takes great care. It is easiest if the silver plating is thick. If the part isn't plated yet, ask the plater for extra thickness. I always ask for double silver from Anderson Silver Plating. After that, make sure to fit the braces as closely as possible to the part, reducing gaps. Be extremely careful to heat the parts evenly and not overheat either part. Use plenty of flux and work as quickly as possible to fill the entire joint with solder. The same applies to wiping the excess, work quickly and do not use more heat than needed to melt the solder.
Solder works at the molecular level, mixing with the metal surfaces. More heat and more time will result in more mixing of silver and/or brass with the lead/tin. It doesn't take long to remove the entire layer of silver, but the thicker it is, the easier it is to clean the solder off without going through it.
Use rags or paper towels to wipe off excess solder while heating with the torch. This will seem to spread it further on the surface, but practice will keep it to a minimum. Heat just a small spot at a time and wipe immediately, then move on to adjacent spots. Cotton swabs on sticks (like Q-tips) are great for areas difficult to reach and are available with bamboo sticks, which are stiff and don’t break easily. Always use a spot on the rag or swab that doesn’t already have solder on it to avoid re-applying to the hot surface.
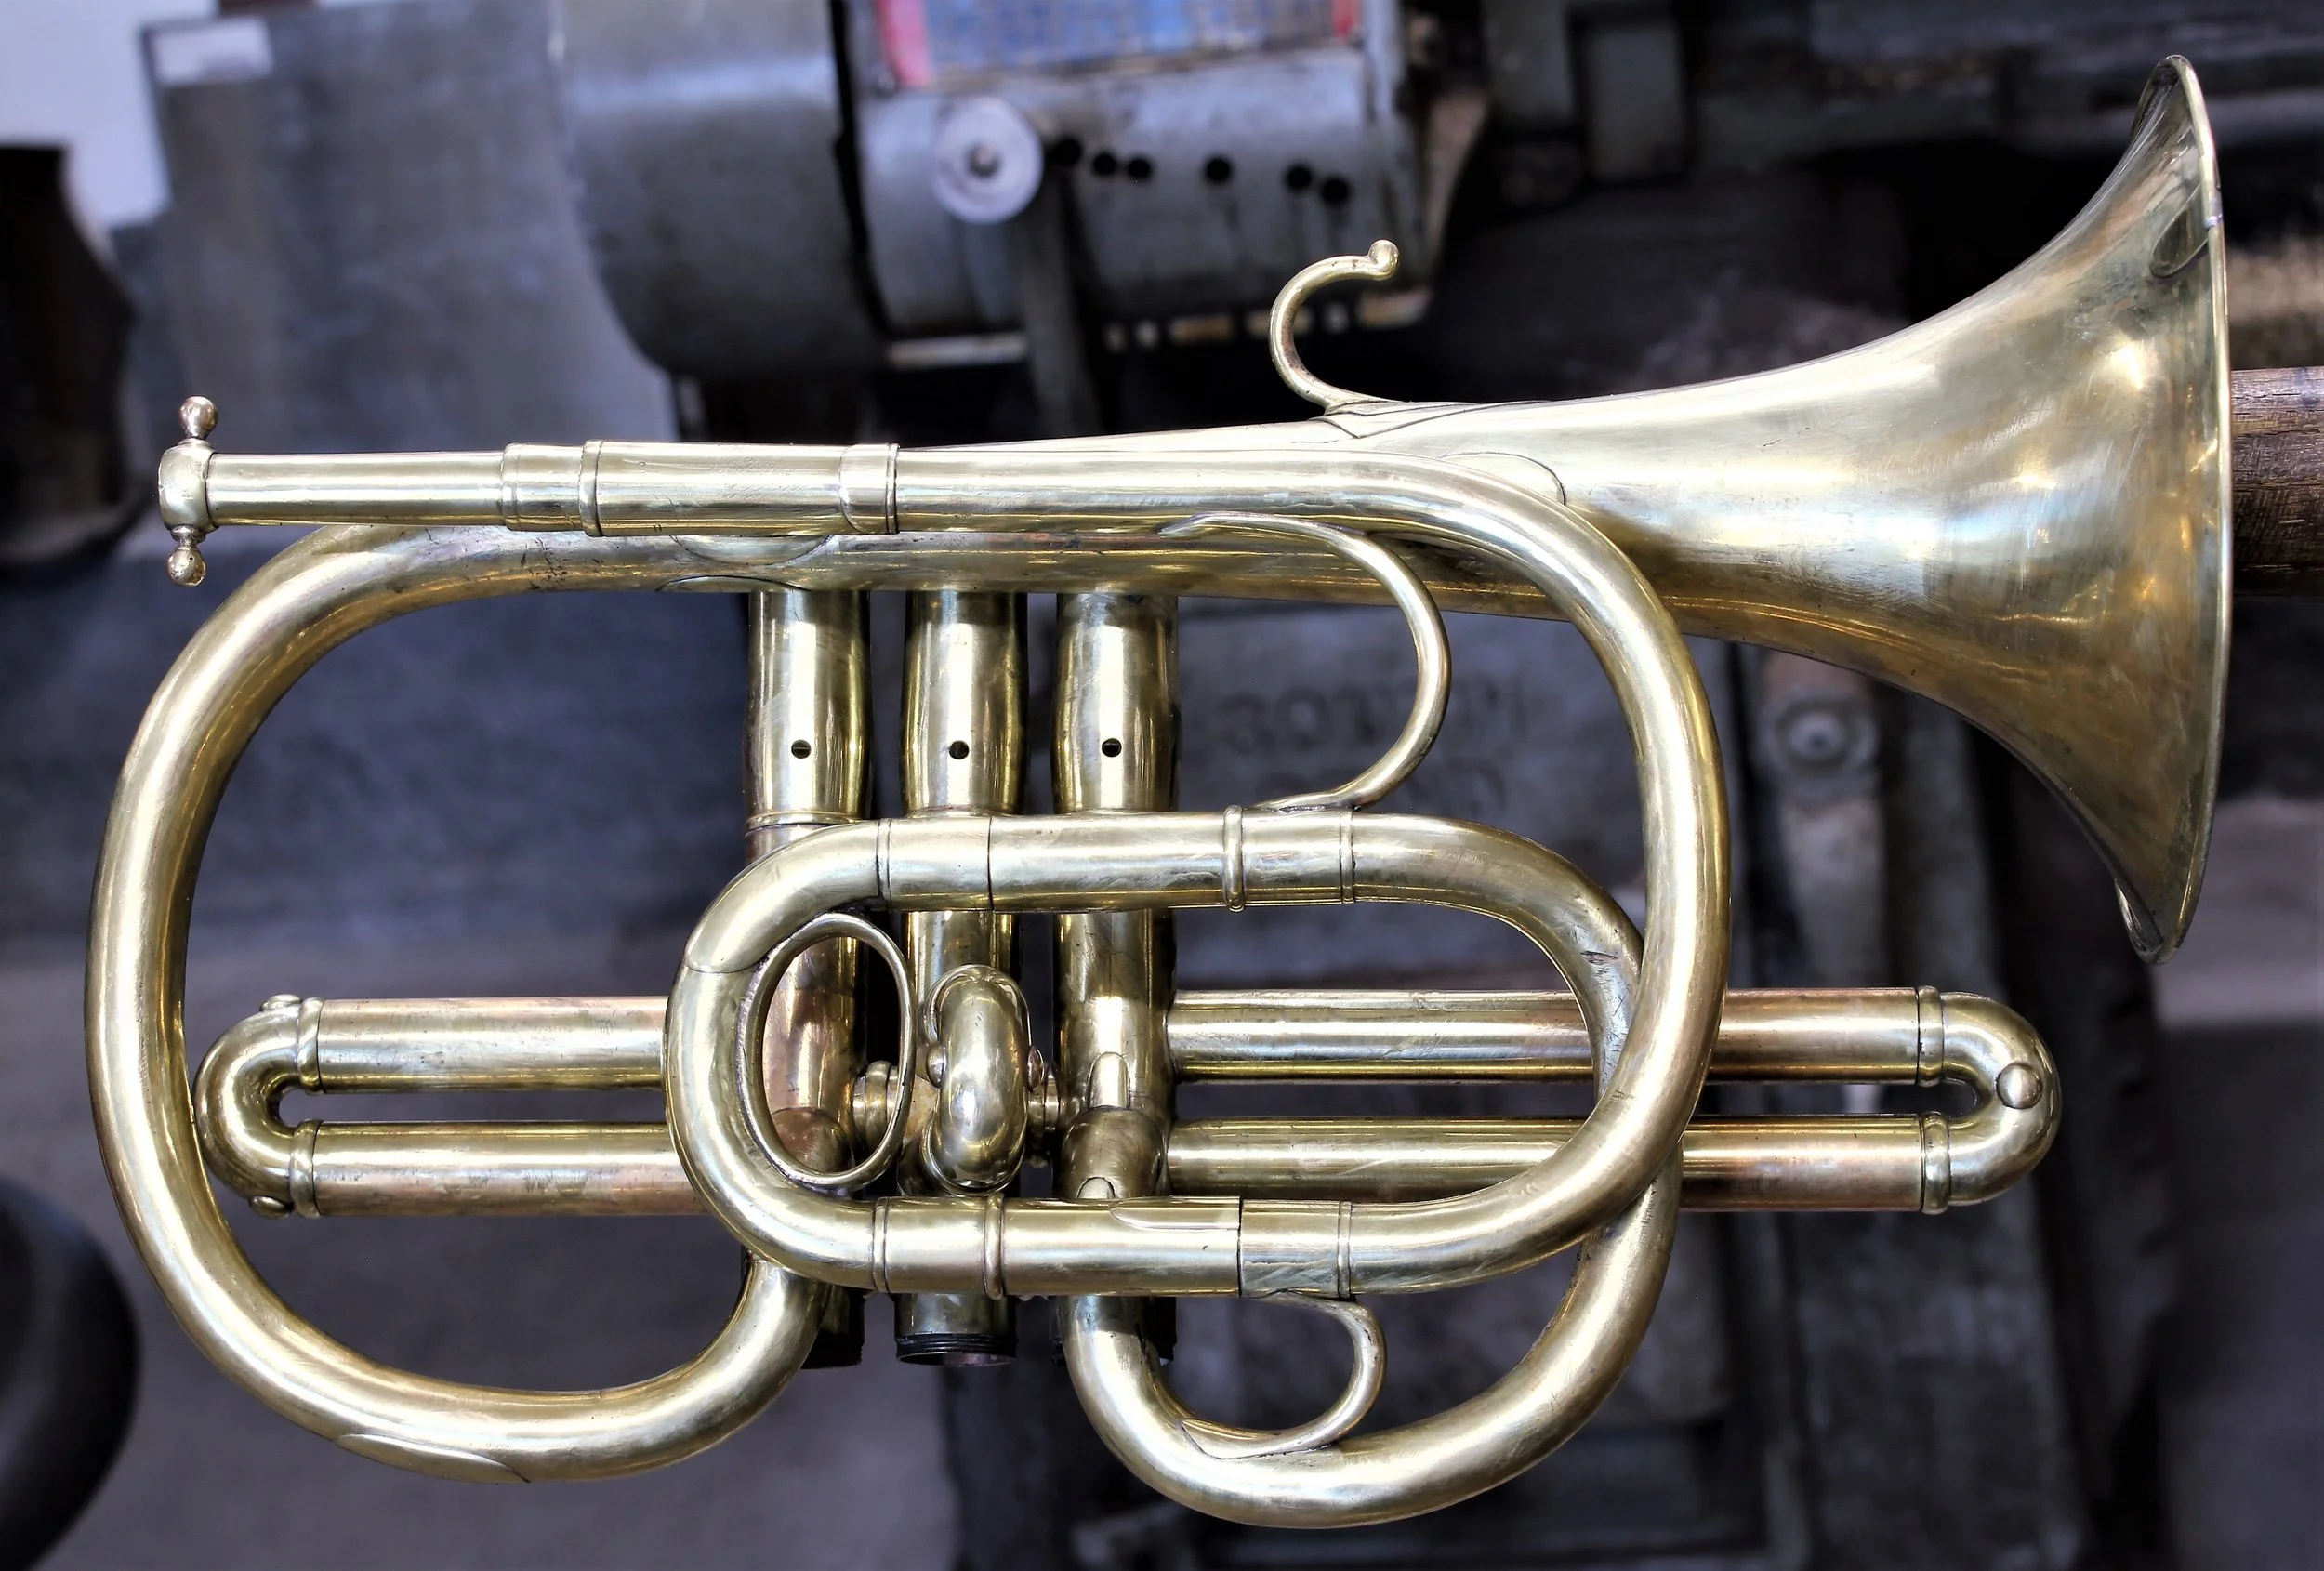
The photos below don’t show a lot, but maybe just how messy it can look and easy to clean up.


As soon as finished soldering, rinse the entire instrument with fresh water to remove the flux completely. It can’t be stressed strongly enough, the damage that is caused by flux left on the surface or inside the instrument. It forms a hydrophilic crust that will continue to erode the surface and leach zinc from the alloy. This is ruinous to the instrument and excessive amount of metal will have to be removed if a clean surface is desired later.
Scraping the edges of the joint is optional, but will result in a much cleaner appearing finish and avoid the temptation to use abrasives excessively hard, removing too much brass. Commercially available solder scrapers are very limited in design and will almost always need modifying to work satisfactorily. An infinite variety of scraper designs can be made from oil hardening tool steel by bending and even hammer forging while red hot, quenched in oil and then tempered by heating to a straw color. After getting the desired shape, then sharpen by grinding or on oil or diamond stones. It is worth your effort to keep these tools sharp, as they dull rather quickly when used daily. This toolmaking may seem out of your comfort zone, but is not difficult to learn and can enhance your work considerably. It should also be possible to make scrapers from high speed steel or with carbide tips, which would hold their edges much longer, but that adds further complications. An excellent (highly recommended) small three sided scraper made by Noga is available from MSC Industrial Supply and carbide blades can be bought separately.

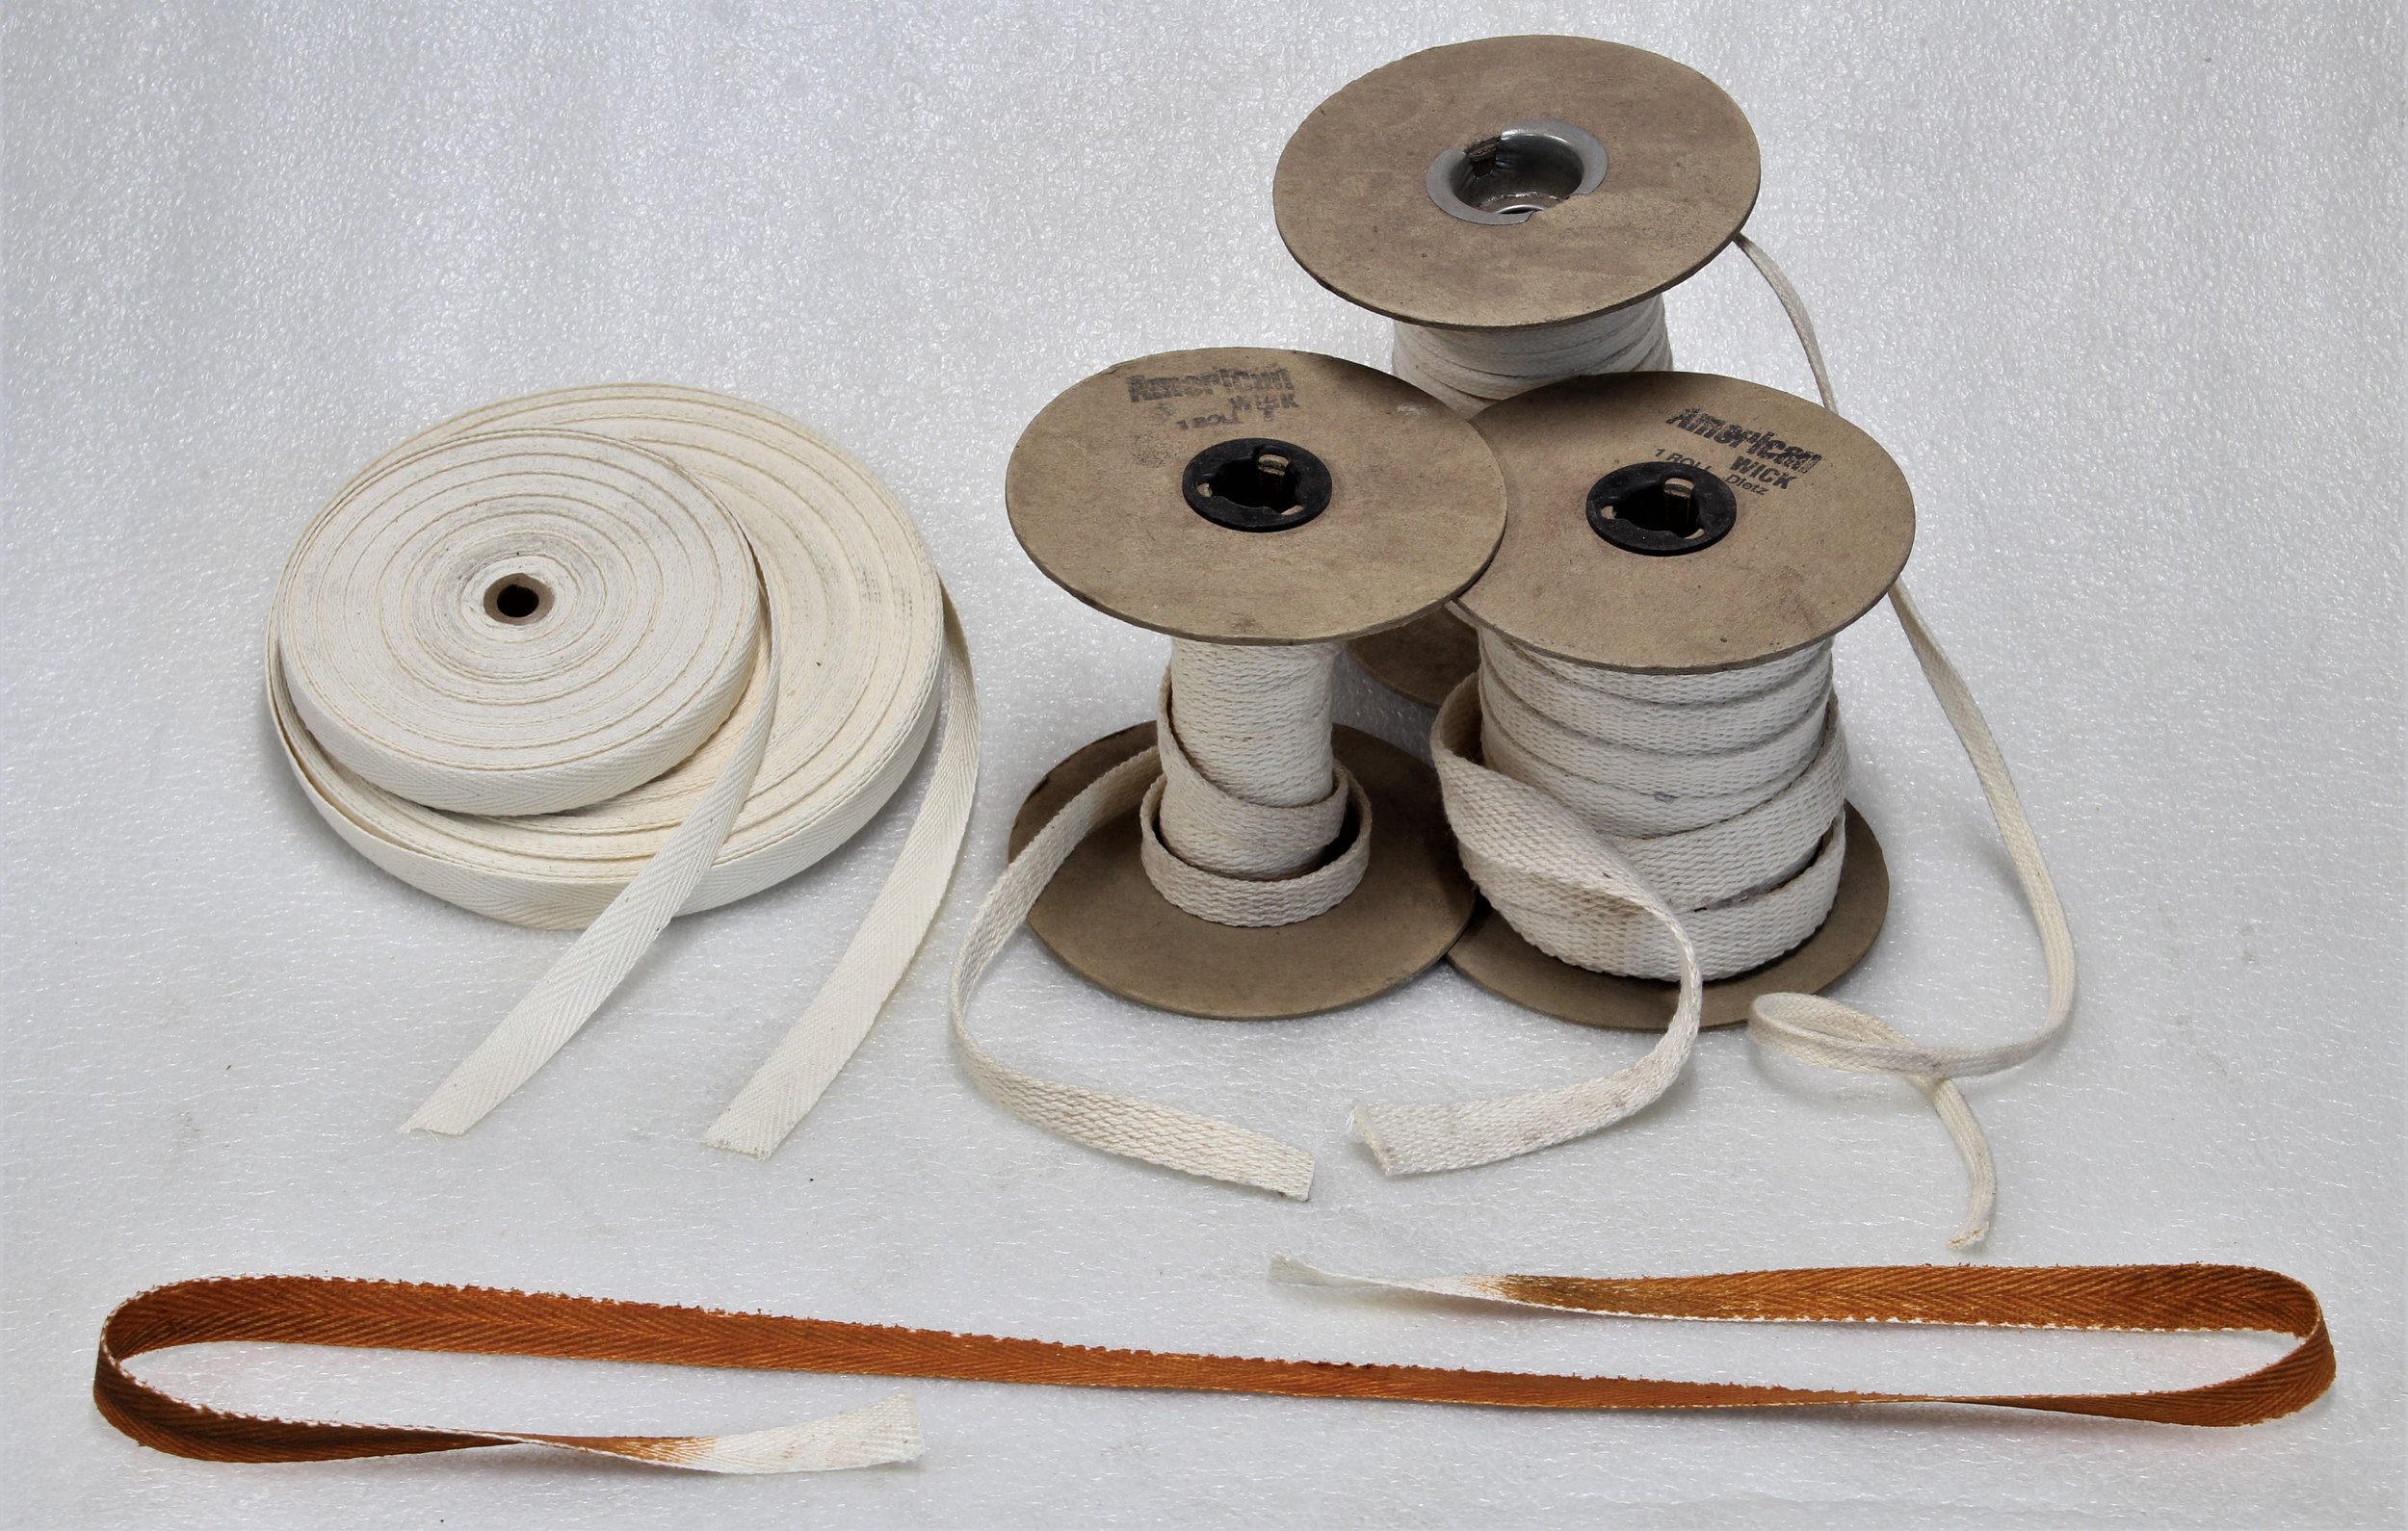
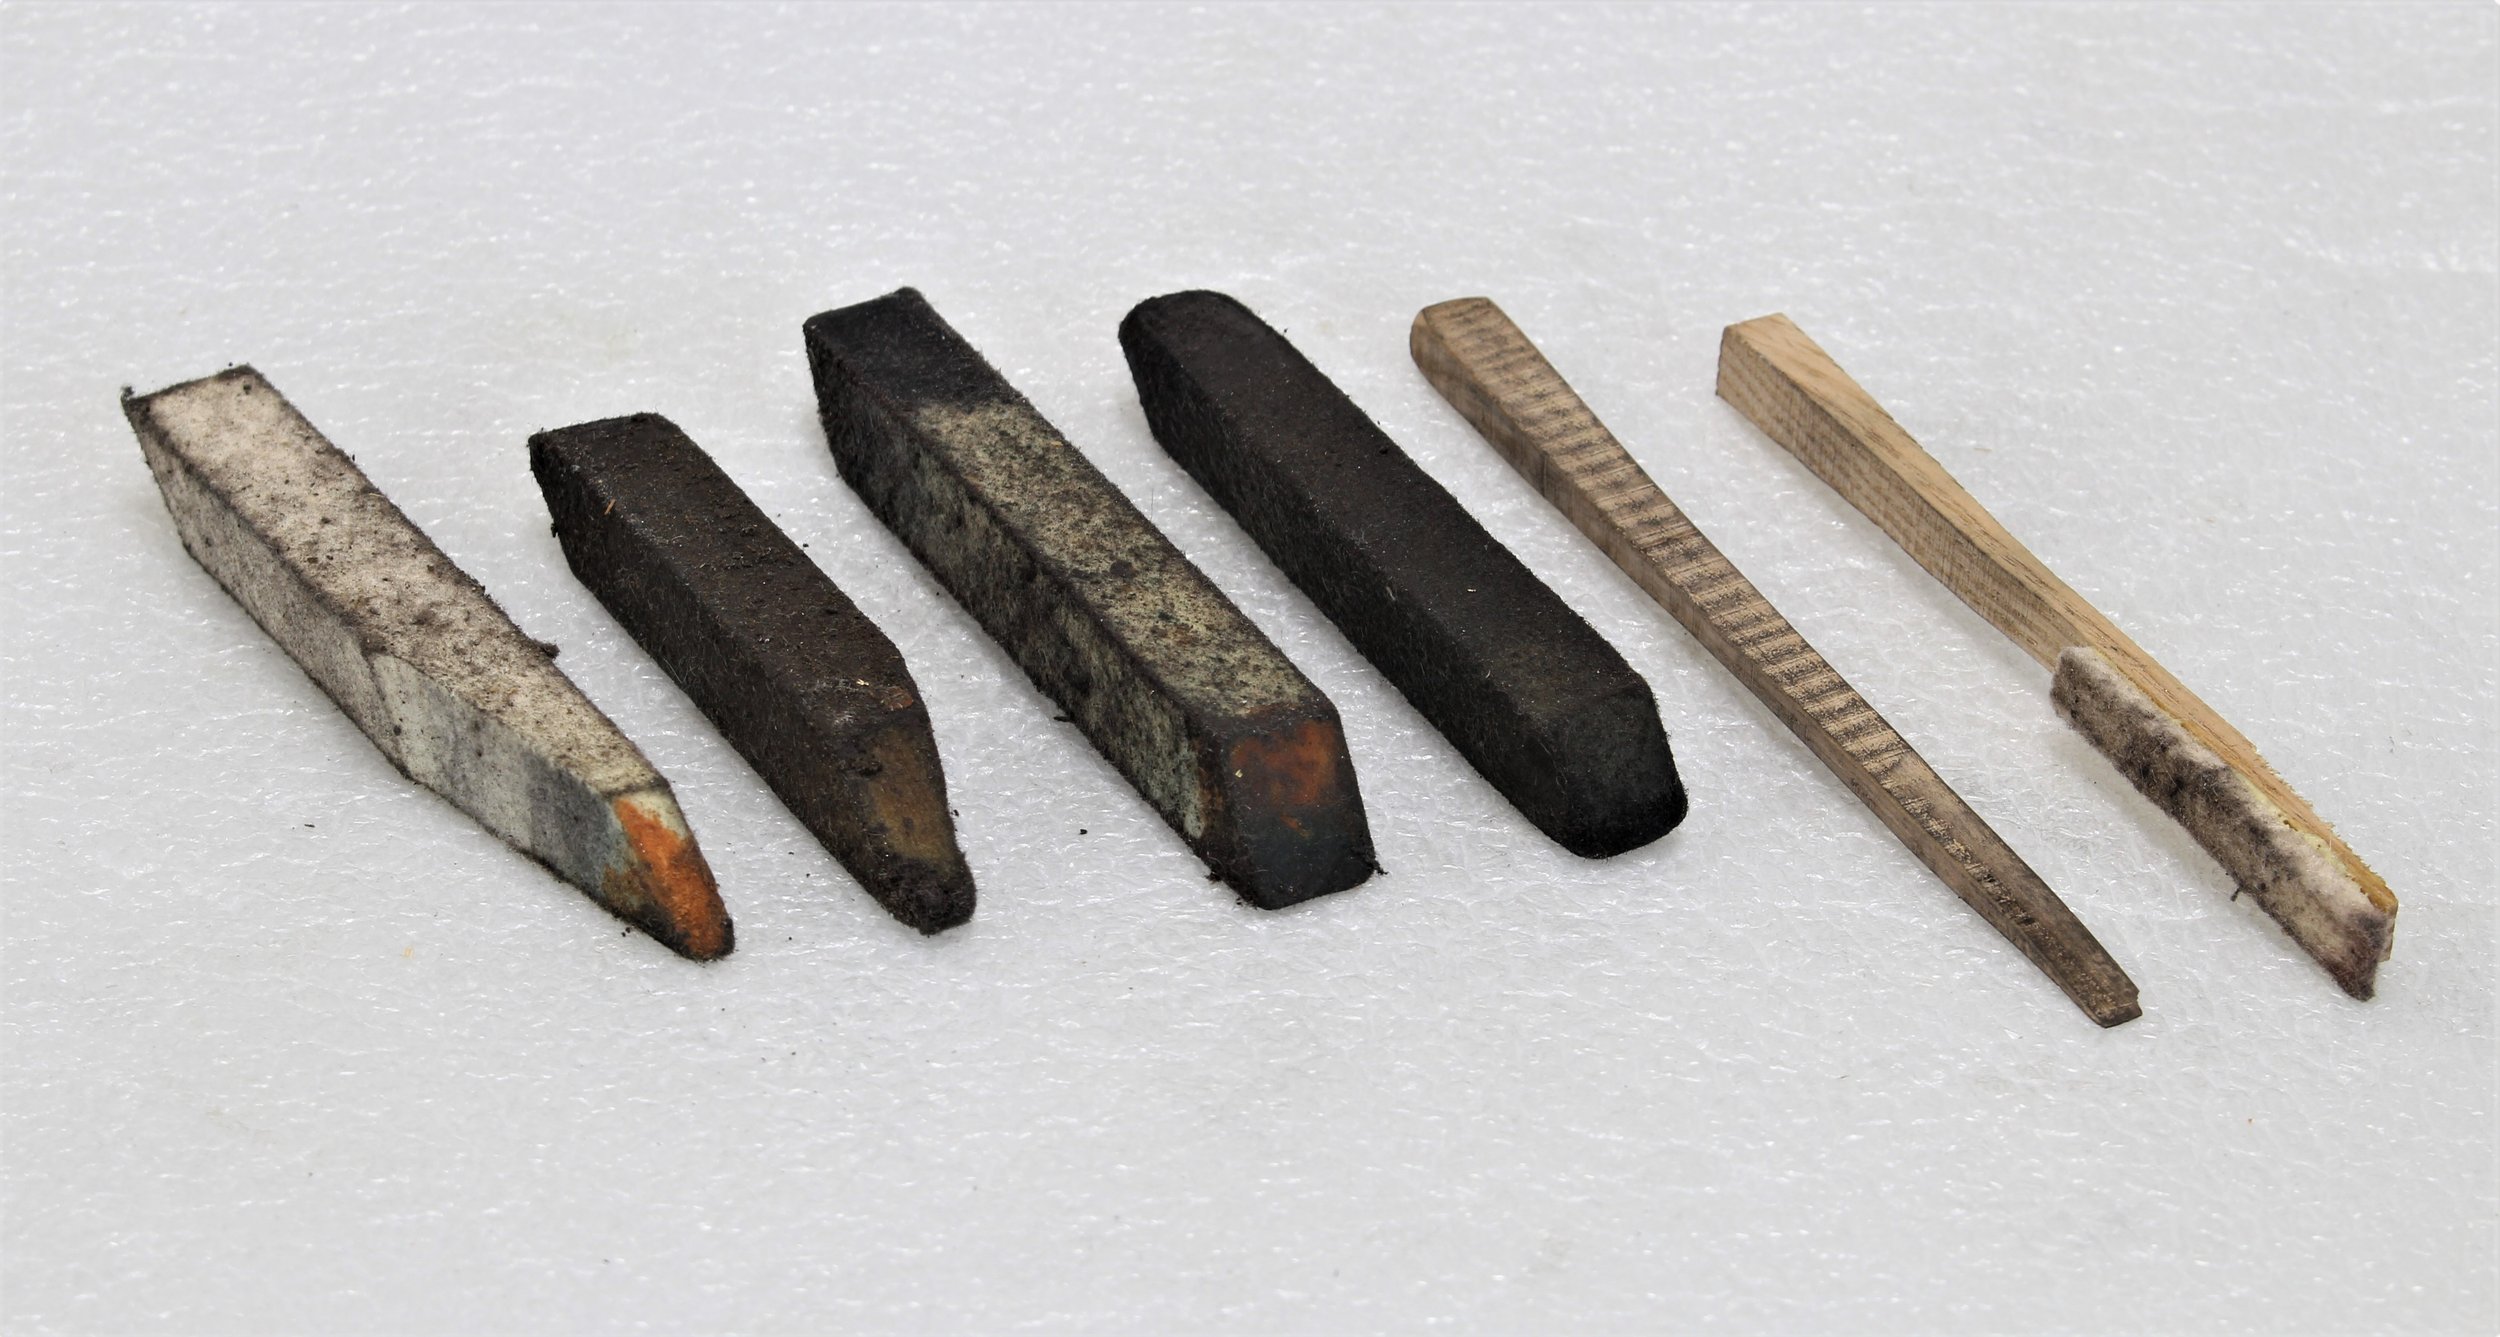
The next step is to remove the rest of the solder from exposed surfaces. This is usually done with tripoli on a buffing wheel and rags or straps. Razor edge buffs are excellent for this purpose, but remove material quickly, so use a light touch and pay attention to how it is working. Cotton wicking, available from Allied Supply Corp. and others is excellent for heavy ragging, but thinner cotton webbing strips do a finer job and easily available from McMaster-Carr. The rag or strap can be wrapped around a stick to more easily apply pressure as you are abrading against the edges of braces and the like. Freshly applied tripoli will always abrade fastest. Another very handy tool for use with tripoli to get around brace flanges, are medium density felt polishing sticks, available from MSC Industrial Supply. If preserving a silver plated surface, forgo the buffing wheel and remove all the solder by hand. This is where the felt polishing sticks are especially useful and your fingernail against a rag will also work to abrade against the edge of joints.
Once this is all cleaned up, the area can be brightened up with red rouge and/or cream metal polish. Cotton is best for this, especially flannel.

Lacquer can be touched up most easily by spraying from aerosol cans. The instrument can be masked to avoid overspray, but the over sprayed edges can also be polished off of epoxy finishes quite easily by very carefully buffing with red rouge. Touching up with epoxy is also possible, especially very small areas. Apply the epoxy with an artists brush, allow most of the solvent to evaporate, and then heat with an electric heat gun to about 240 degrees Fahrenheit until hardened. Once up to temperature, it hardens almost immediately.
If you have any additional ideas to add to this page that you think might be helpful to others, please contact me and I’ll add them.