Pulling Stuck Slides
Every brass player but the most meticulous will occasionally have a stuck slide in his or her instrument. If addressed right away, the player will be able to remove the slide with a piece of cloth wrapped around the crook for a better grip. All the old instruction books recommend a handkerchief, back when we used to carry them.
Unfortunately, most players are not meticulous with their maintenance, and end up with a slide that they are not able to pull with this technique and will bring it to a repair shop for help. About 80% of these, I'm able to pull in the front office without the aid of tools, due to the fact that my hands stay fairly strong from constant use (although much less strong than when I was young!) and I know how and where to concentrate the force on the instrument and slide.
This is the first step: most slides, even small, well braced examples can be twisted slightly as you pull on them, which will start to loosen the minerals (dried spit) that are cementing it in place. At this point, I ask the customer, "Do you want to take this home and give it a good cleaning and lubricate everything, or do you want to leave it with me to do a thorough job, with new felts and corks?" If he/she leaves it, I will clean it, give it an acid bath and clean it again, before re-assembling it with everything in good working order, including springs, corks and aligning the valves with felt or (my preference now) foam rubber washers.
If I have the time, I might take the instrument back to the shop while the customer waits and spend a few more minutes with more advanced techniques to remove the slide, but more often, I tell the customer that they need to leave it with me or bring it back when they can, so that I can guarantee success. I make sure to quote a range of possible cost, since I have no way of knowing how badly stuck the slide is until I have successfully freed it.
The next step is to use a piece of cotton wicking or other suitable cord that is fairly strong, but won't mar the finish. Looping around the crook in this way will keep the slide from flying across the room, which would cause dents in the crook or tube ends. The ends of the cord or wick can be clamped in your vise, so that you can pull on the instrument with one hand while applying heat and taps with a small rawhide mallet with the other.

Pulling slide with cotton wicking.
Applying heat is the first thing that you should do, before any other measures. Surprisingly often, the slide is held in place with oil or grease that has been solidified by oxidation or other chemical reactions that I don't understand. In these cases, the heat will soften the oil/grease so that the slide will pull out easily. In extreme cases, the degree of heat needed to aid in this way is enough to melt solder, which is very annoying. I have had this situation occur only a handful of times in my career, and I wonder what sort of lubricant (or glue?) had been applied to the slides many years before.
Along with heat, apply some penetrating oil at the edges of the slide tubes. If the slide is thoroughly encrusted with minerals (dried spit), the penetrating oil cannot lubricate the entire length of the tubes, but as they start to move, the oil will start to mix with the solids (dried spit) and aid in the movement. Light blows of the mallet cause kind of a shock wave of movement, similar to the twisting that I mentioned previously. Care must be taken to avoid denting the tubes or adjacent crooks, knuckles and braces. The heat and blows must be applied at the same time that you are pulling on the slide to gain this advantage and this is all that is needed for success in most cases.
The meat of this article is in the more unusual cases that are not experienced on a weekly basis by the average brass mechanic, but might be seen several times a year. Specializing in antiques, I see these situations more often, but much more distressing are the failed attempts that I encounter almost as often. The next few photos show some tuning crooks that have been ruined by applying force with a blunt instrument to the inside radius. Once they are smashed and sometimes split open in this way they can never be satisfactorily repaired. Unfortunately, some of the musical instrument repair suppliers sell devices that can only be used without causing damage when they are not needed. Instead, they are taken out of the toolbox in the difficult cases, where they are sure to do this sort of irreversible damage.

The next photo shows a tuning crook in a cornet that was made playable again, but it seems a sad compromise.
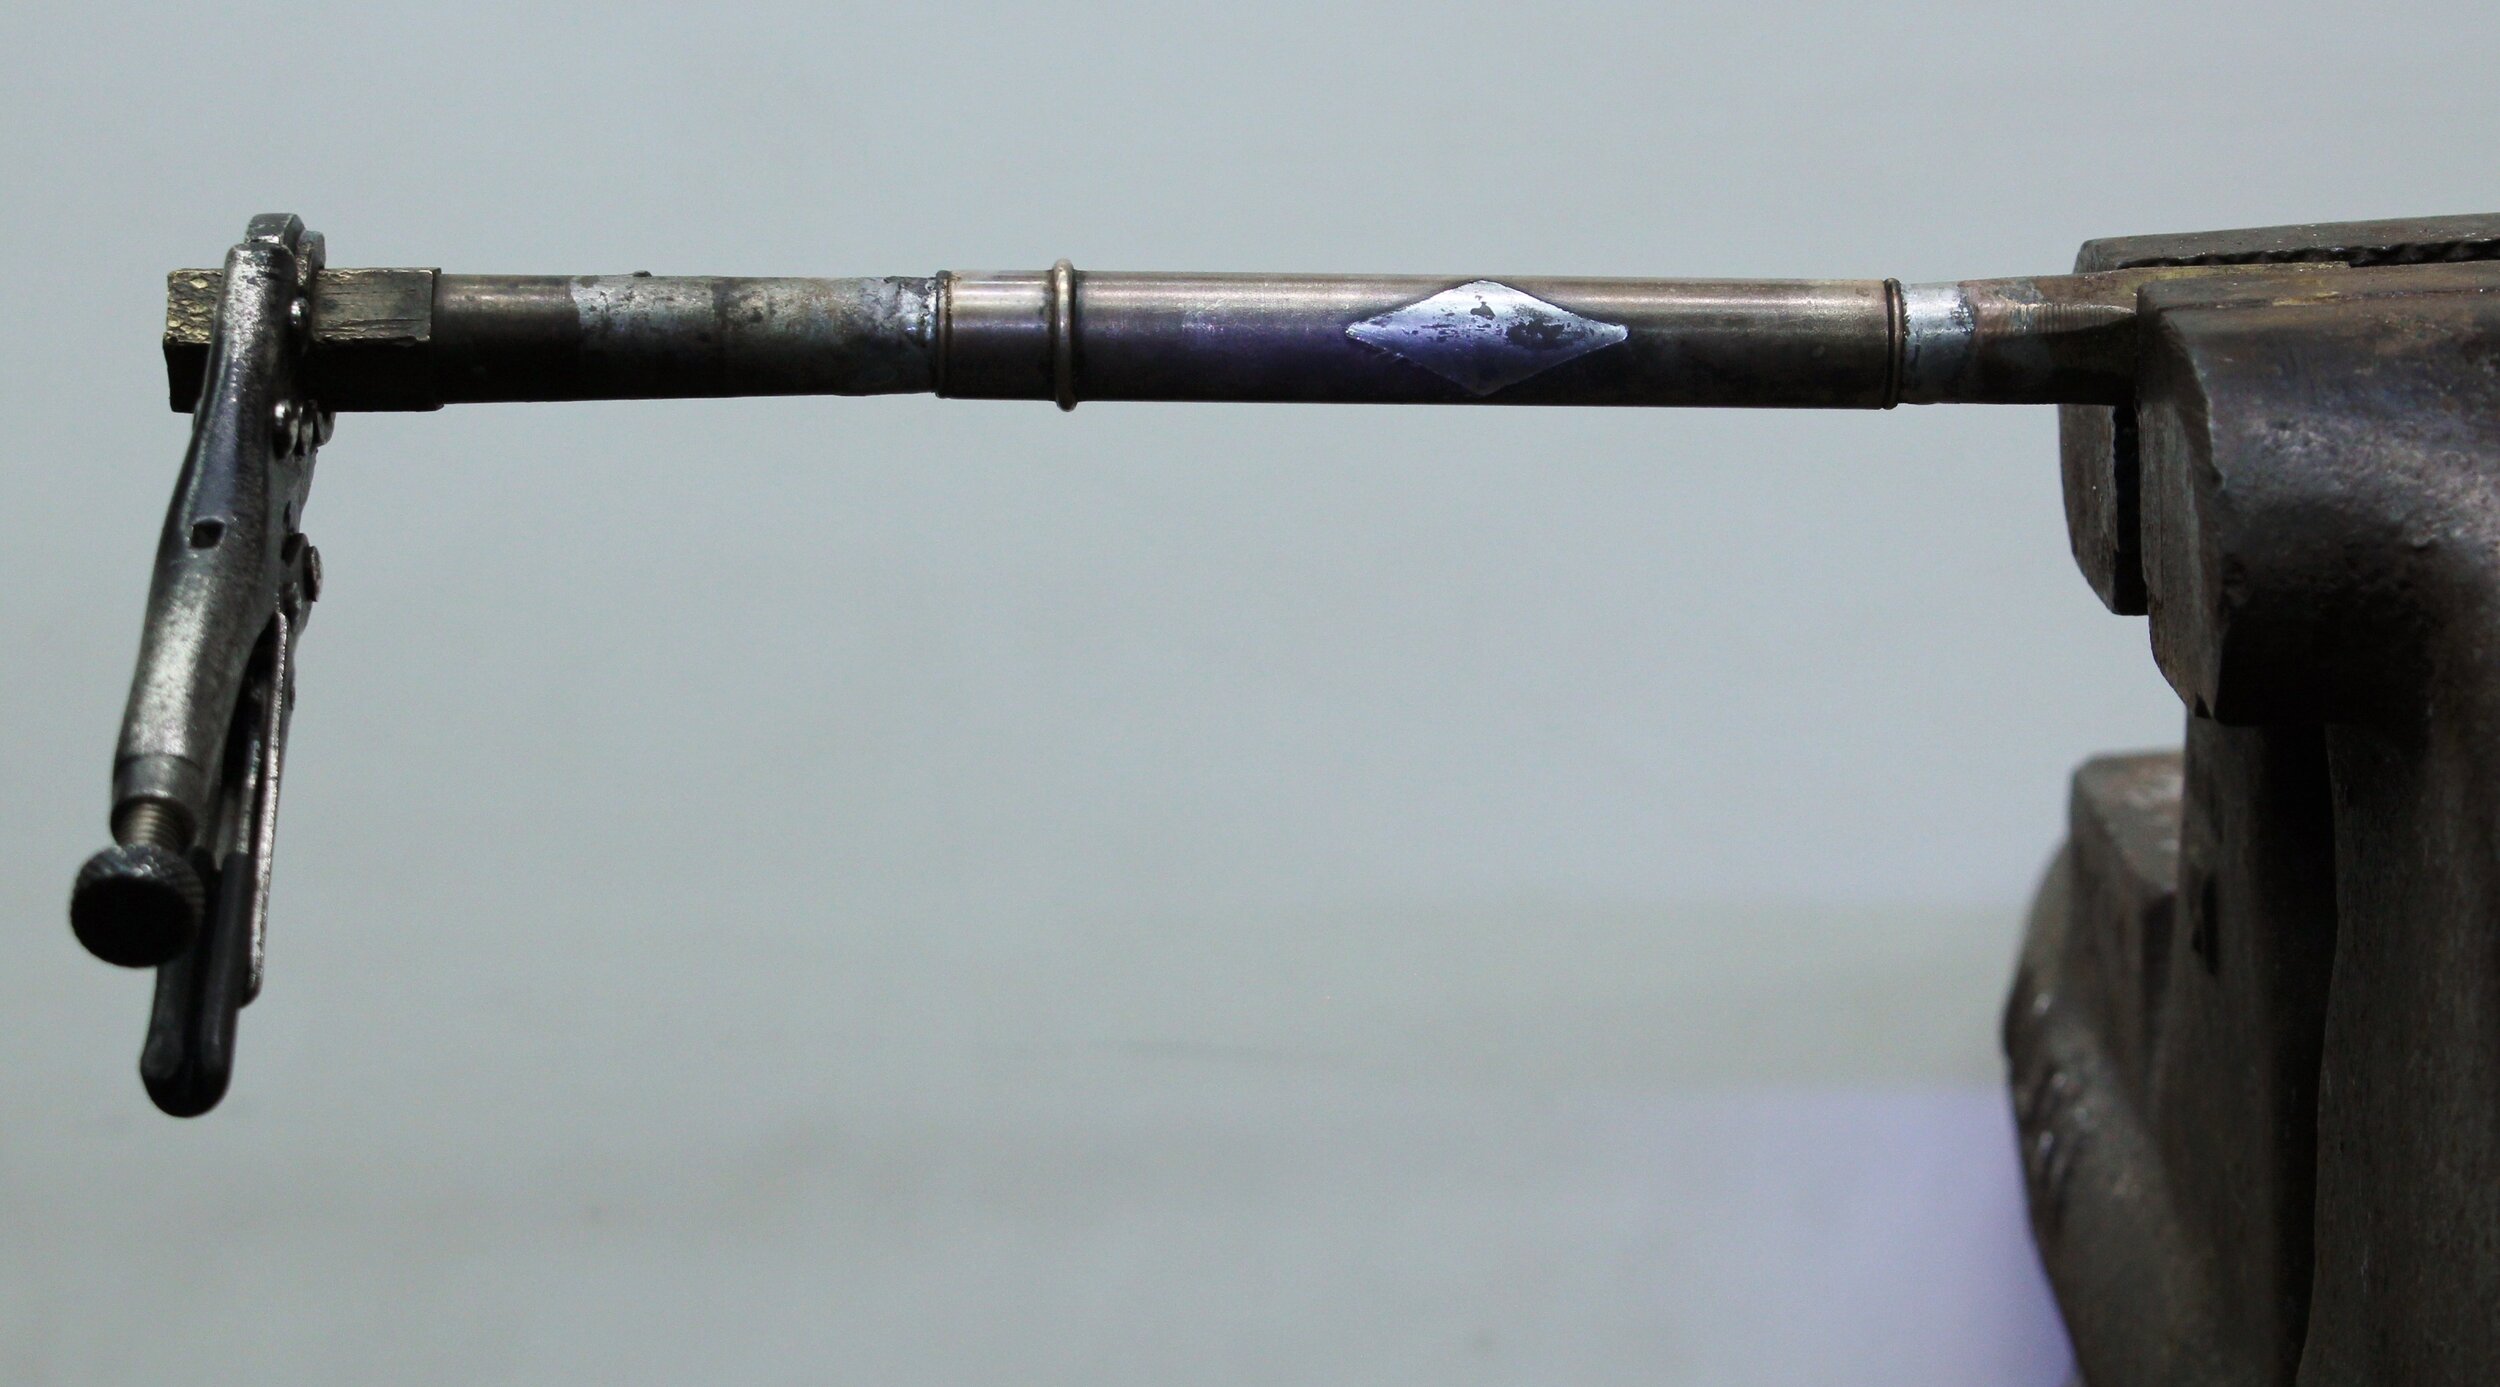
The next photo shows a technique that involves applying pulling force with the tail stock of a lathe. I wish that I had discovered this earlier in my career and it works in many tough cases. This allows me to apply constant pulling force while I apply heat and mallet blows. I can't stress enough that you need to be careful not to do damage to any parts of the instrument as you are applying force to remove the slides.

Applying pulling force with lathe tail stock.
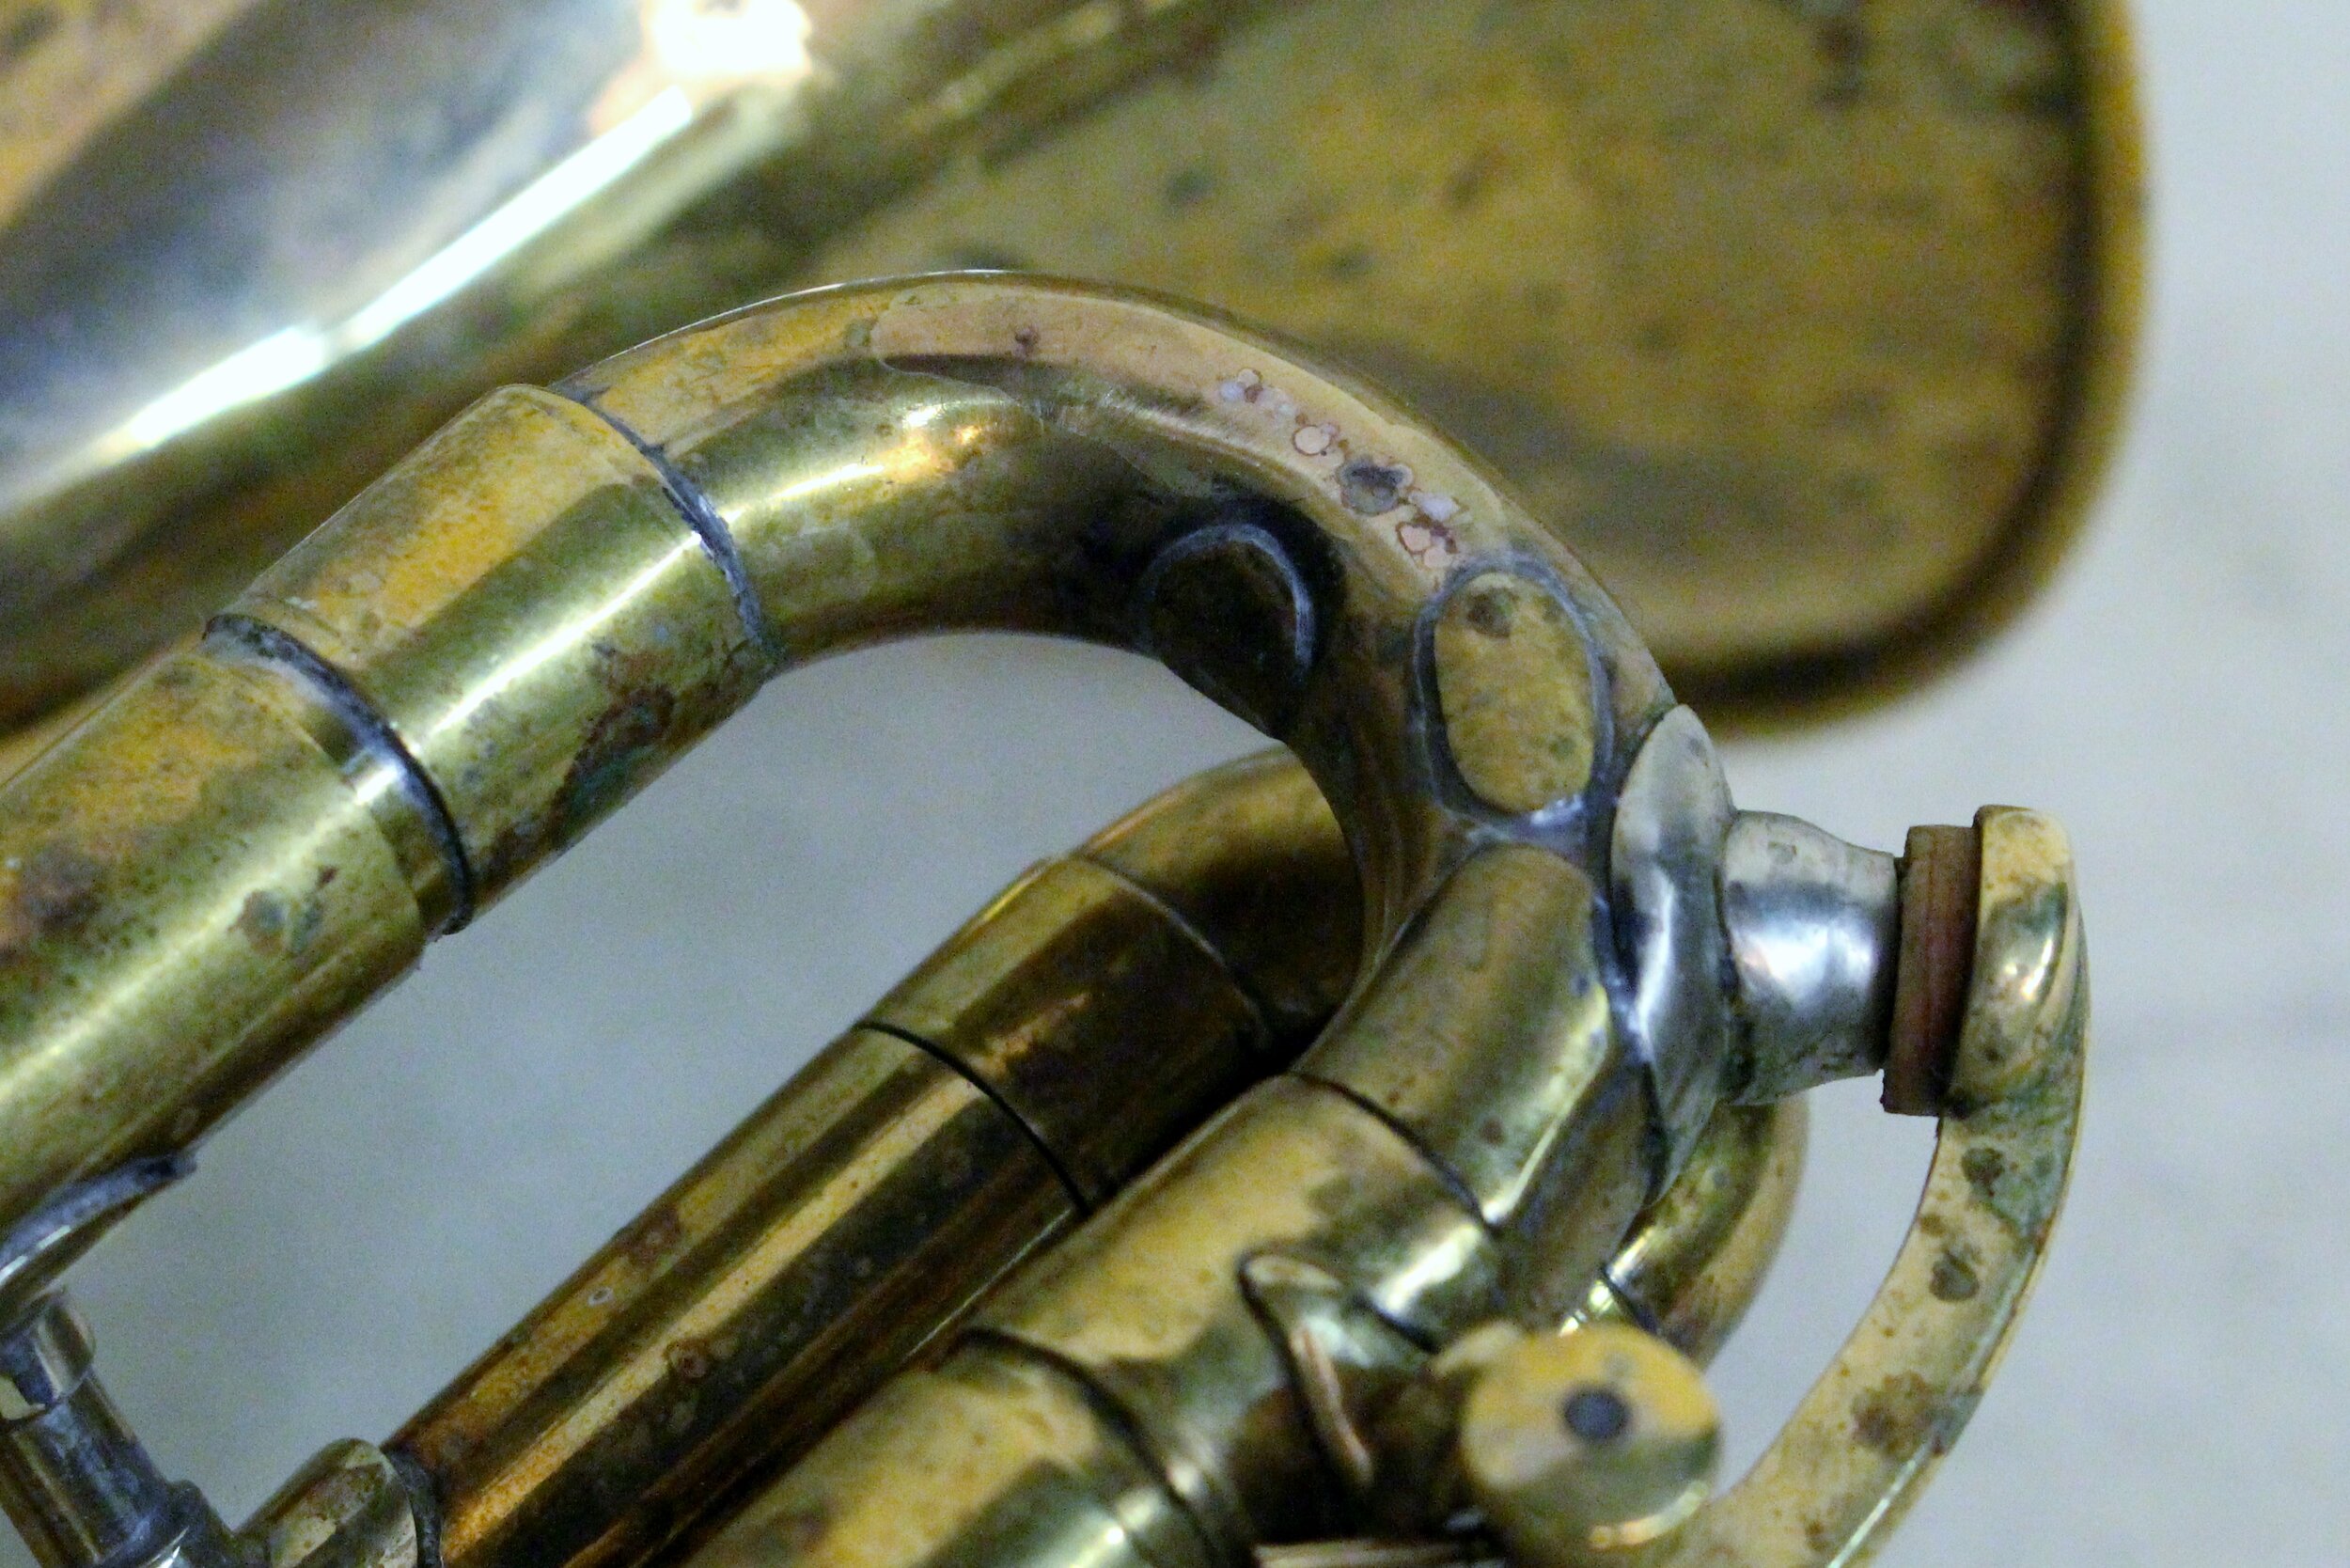
In this photo the cord is wrapped around one of the diamond post braces on a Bach trumpet. These will hold up to this force in most cases, but they are not very strong, and if already compromised, will break away fairly easily. Also, if the solder joints where the tubes join the valve knuckle are deteriorated, the tube will pull loose at that point. This is most common with the very short solder joints on a trumpet or cornet second valve slide and also the main tuning slide, but isn't necessarily a cause of damage as long as you are watching the opposite slide tube moving free at the same time.
One tube will almost always be more stuck than the other and this is most noticeable in the main tuning slide (assuming it is closest to the player and his/her saliva) and are easily damaged as seen in the fifth photo. A minor bend in the tuning crook like this is easily repaired, but can quickly bend further, ruining the crook.

Distortion in crook as one tube pulls loose without the other.
The more severely stuck slide must be isolated, first by removing the crook. One end of the crook can be soldered into the stuck slide tube, giving a handle to apply torque to the tube, which often is all that is needed to get it moving. If this doesn't give enough force, the next technique is to solder in a rod or slug that can be clamped in a vise or pliers and torqued back and forth as seen in the next photo. If great care is not taken, this force will break the braces that attach the tuning tube to the bell or the mouthpipe to the valve section.

Plug soldered in tube for greater twisting force.
If still not moving, the next step is to remove the assembly from the instrument so that the other end can also be soldered to a slug, as seen below.
Plugs soldered into both tube ends.
At this point, the only failures that I've experienced were in cases when the inside tube is corroded through and breaks off or in antiques with seamed tubing, when the seam gave way, usually in the inner tube, but every precaution was taken and it couldn't be avoided. Of course, there have been many more times, when the seam has already broken. When dealing with an important antique, this can be repaired rather than replaced.
The last three photos show a case where the tube has broken off. I could carefully solder my slug into the inside tube, but since I had to take the outside tube off anyway, I put it in the lathe and bored out the broken tube. I then made a new tube to replace it. I show how far the instrument had to be disassembled to free this tube and the finished instrument. There was no noticeable loss of silver plating, although this had a lot to do with the fact that the original plating is a nice high quality and thick layer of silver.

Tube broken off within the outside tube.

Disassembly required for this repair.

Repair completed; happy ending.
All these variables have to be taken into consideration and instruct us that it is wise to give a wide range of possible cost to the customer. Nothing informs us better than experience, made especially memorable by working those unexpected hours without pay in order to get the job done right.